
iPhone and iPad security: locking, sharing and account protection
Make an iPhone or iPad safer with updates, a strong passcode, a protected Apple Account and a review of app permissions. Stolen Device Protection and Find My help most people; Lockdown Mode is for those who may be targeted by highly sophisticated attacks.
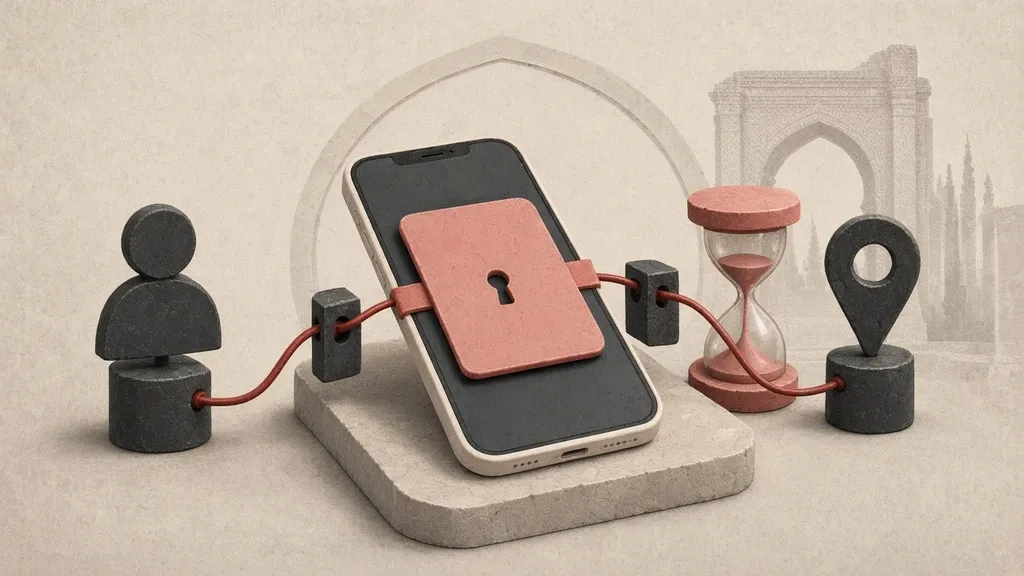
An iPhone or iPad stays safer when the system is up to date, the device passcode is strong, the Apple Account is protected like a primary account, and you review app permissions yourself. Stolen Device Protection and Find My help most people, because a stolen phone together with a known lock-screen code is a common reality. Lockdown Mode is a separate tool and only makes sense for people who may be targeted by a highly sophisticated attack. Most people do not need it, and turning it on without a reason makes everyday use harder.
Device backups are covered separately in backups you can restore, and sign-in secrets in the guide to a password manager. Apple’s official explanation of Lockdown Mode is here: support.apple.com/en-us/105120.
Keep the operating system updated
Apple’s patches close security holes and sometimes add a new capability such as the theft security delay. Get updates from the device itself, not from a file or link that arrived in a message.
- Go to Settings > General > Software Update.
- If a version is waiting, read the notes and install it. The device should preferably be on Wi-Fi and on charge.
- Tap Automatic Updates and turn on automatic download and install so patches are not left sitting.
- After install, open the same screen once and confirm it says the latest version is installed.
- Update apps from the App Store as well; many holes live inside apps, not only in the operating system.
If the device is too old to get major updates, you have a decision to make: stop using it for sensitive work, or accept that new security patches will not arrive. Keeping an old phone only for emergency calls with empty accounts is different from using mail and banking on that same device every day.
Take the device passcode more seriously than face or fingerprint
Face and fingerprint are for convenience. The real key is the passcode you enter after a restart, after several failed attempts, or whenever the system asks for it. A short four-digit code or a birthday is easy to guess. Someone who has taken the phone and watched the code over your shoulder can, without a further layer, get close to the Apple Account and saved passwords.
- Go to Settings > Face ID & Passcode. On an iPhone with a Home button the path is Touch ID & Passcode. Enter the current passcode.
- Tap Change Passcode.
- Open Passcode Options and, if you can, set a Custom Alphanumeric Code. If not, at least choose a numeric code longer than four digits that is not a date or a repeated number.
- Scroll down that same screen and see what is available while the device is locked: Control Centre, Notification Centre, Wallet, accessories and similar items. Turn off anything that does not need to open from the lock screen.
- If there is an option to erase data after ten failed attempts, turn it on only if you have a reliable backup; otherwise a child or someone typing the wrong code may wipe the device.
Do not add someone else’s fingerprint or face for convenience unless you really want them to have that level of access. After a repair or a restore from backup, review the list of faces and fingerprints once.
Turn on Stolen Device Protection on iPhone
This feature exists on iPhone from iOS 17.3 onward, not on iPad. It is there so that if someone steals the phone and also knows the screen passcode, they cannot immediately change the Apple Account password, sign out, turn off Find My or change the device passcode. Some actions accept only Face ID or Touch ID, and some also require a security delay of about an hour so you have time to mark the device as lost.
To turn it on you need a device passcode, Face ID or Touch ID, two-factor authentication on the Apple Account, Find My, and Location Services with Significant Locations. On newer versions it may already be on by default; check it yourself anyway.
- Go to Settings > Face ID & Passcode and enter the passcode.
- Tap Stolen Device Protection and turn it on. If you do not see the option, set up Face ID or Touch ID first and check the system version under Software Update.
- Under Require Security Delay pick one of the two modes: Away from Familiar Locations, the default, which is less strict at home or work, or Always, which applies the same delay and biometric requirement everywhere.
- Familiar locations are built from your usage pattern. The path is Settings > Privacy & Security > Location Services > System Services > Significant Locations & Routes.
- Before you sell or trade the phone, turn this feature off. If you are away from a familiar location, the same security delay starts before it will switch off.
The Always mode suits someone who is also worried about theft from home, but it also slows down changing your own passcode. Most people reach a reasonable balance with the default mode and a strong passcode.
Find My and Activation Lock
Find My has to be on before the device goes missing. Turning it on also turns on Activation Lock automatically, tied to your Apple Account, so someone cannot erase the device and set it up again without you.
- Go to Settings > [your name] > Find My.
- Tap Find My iPhone or Find My iPad and turn it on.
- Also turn on Find My network so that if the device is not on its own internet connection, nearby Apple devices can return an approximate location anonymously.
- Turn on Send Last Location so the last place is sent when the battery is nearly empty.
- Once, open Find My from another device or from iCloud.com and confirm this device appears in your account’s list.
If Find My is off and the device is lost, you usually cannot see its location or put it into Lost Mode remotely. In that case, at least change the Apple Account password immediately from another device.
If the device is lost or stolen
The priority is to lock it quickly, not to search the street while the account is still open.
- From another iPhone, iPad or computer signed into the same Apple Account, open the Find My app or the official Find website.
- Select the device and mark it as lost. That locks the screen.
- If the device was stolen, do not put a personal contact number in the lock-screen message; Apple warns that a thief may use that number for further deception. If it was simply lost and you hope a finder will return it, leaving a way to contact you makes sense.
- Do not remove the device from the Find My list. Removing it lifts Activation Lock and makes resale easier.
- From a healthy device, review the Apple Account password and remove unknown devices from the account. Also check stored cards and payments through the official bank or wallet path.
- Erase remotely only when you no longer hope to get the content back, or when the data must come off the device. A remote erase cannot be undone. Even after erasing, do not remove the device from Find My.
Stolen Device Protection buys time; it is not a substitute for marking the device lost quickly. Apple will not call you to say the device has been found. Do not read a passcode or verification code to anyone who calls you.
Treat the Apple Account like a primary account
The Apple Account unlocks photos, backups, Find My, purchases and often saved passwords. If you lose it, recovering the device becomes harder too.
- Go to Settings > [your name] > Sign-In & Security.
- Check that two-factor authentication is on. Read the trusted numbers and delete any number that is no longer yours.
- Look at the devices on the account and remove any name you do not recognise.
- Choose recovery methods deliberately. A recovery contact can send you a code to get back in; they do not get access to the contents of your account. A recovery key is a long code that Apple does not keep a copy of. If you lose it and no other path remains, you may not reach the account or its encrypted data.
- If you create a recovery key, write it on paper or keep it somewhere other than the iPhone itself. Apple says not to store it in the Passwords app, iCloud Photos, Notes or iCloud Drive, because losing the account means losing those places too.
Do not make the Apple Account password the same as the device passcode, and keep it in a separate password manager. Do not share one account among family members; for shared purchases and location use Family Sharing, not a single Apple Account.
Advanced Data Protection for iCloud
In the standard mode, Apple keeps parts of cloud data in a form that can be recovered with your account. Advanced Data Protection end-to-end encrypts a larger set of iCloud data and does not leave the keys with Apple. That layer helps if you are concerned about access to the same cloud account, provided you take recovery seriously, because Apple can no longer bring that data back for you.
- First update every device signed into this account. A very old device may block the feature from turning on.
- Go to Settings > [your name] > iCloud.
- Tap Advanced Data Protection and turn it on.
- Review recovery methods: the device passcode, a recovery contact or a recovery key. Without at least one alternative method, the system will not let you continue.
- Once, write down where the key lives or who the recovery contact is, somewhere separate, and think through how you would get back in if the phone disappeared tonight.
If this layer feels too heavy, at least manage backups and highly sensitive passwords separately following those guides. Turning it on is not mandatory; leaving it off is not an excuse to skip a strong passcode and Find My.
Limit app permissions yourself
An app usually does not need precise location, the microphone, cross-app tracking or full access to photos in order to show an article.
- Go to Settings > Privacy & Security.
- Open Location Services and pick a mode for each app: Never, Ask Next Time or While Using, or Always only if it is truly needed. Turn off Precise Location for an app that only needs the city.
- Review Camera, Microphone, Photos, Contacts and Bluetooth separately. For Photos, prefer limited access over full access if the app only needs to pick a few images.
- Open Tracking and deny cross-app tracking by default unless you have a reason to allow it.
- If you want to see which permissions apps have used recently, turn on App Privacy Report from this same screen and read it once after a few days.
Install apps from the App Store and read the developer name. If you do not belong to an organisation that should place a management profile on the device, check Settings > General > VPN & Device Management and remove any unknown profile or certificate.
The lock screen, notifications and locking a single app
The first sentence of a message on the lock screen is as much a disclosure as the conversation itself. Reduce previews in public places.
- Go to Settings > Notifications and set Show Previews to When Unlocked or Never, or at least set this separately for messaging apps.
- On the Face ID & Passcode screen, see whether Notification Centre and Control Centre are available while the device is locked; if you leave the device on a table, reduce that access.
- To lock a particular app, press and hold its icon on the Home Screen and tap Require Face ID or the Touch ID equivalent. When Stolen Device Protection is on and the phone is away from a familiar location, opening that app may also require face or fingerprint only, with no passcode fallback.
Sharing: AirDrop, family and a shared account
AirDrop is useful for handing a file to someone nearby. If it stays set to Everyone, people around you can send you files or see the device’s identity.
- Go to Settings > General > AirDrop.
- Set receiving to Receiving Off or Contacts Only. If you need it open to everyone for a few minutes, use the timed option and do not leave it on Everyone afterwards.
- You can also turn AirDrop off quickly from Control Centre.
- For a family, instead of giving out your own Apple Account password, set up Family Sharing and look at exactly what location, purchases and albums are shared with whom.
- Leave live location on only for people who really need it, and review it after a trip or meeting ends.
Wired accessories
By default an iPhone or iPad will not talk to a data cable or a computer while it is locked; it will usually still charge from a simple adapter without being unlocked. That is a useful barrier against an unexpected connection to an unknown kiosk or computer.
- Go to Settings > Privacy & Security.
- Under Security, tap Wired Accessories.
- The default, automatically allowing accessories when the device is unlocked, suits most people. Choose Always Allow only if you have a clear reason.
- On USB-C devices you can require approval for each new accessory. If you often plug into public cables, being stricter is better than convenience.
- Do not plug an unknown cable or charging dock into the data pins while travelling if you only need power.
Turn on Lockdown Mode only when you need it
Lockdown Mode shrinks the attack surface against highly sophisticated, targeted tools and at the same time limits how the device works: many message attachments are blocked, some websites do not load properly, incoming FaceTime calls from people you have not recently called may not come through, shared albums are limited, and a locked device will not connect to a computer or accessory. Ordinary phone calls and plain SMS usually still work, and emergency calling is not cut off.
Apple itself says most people are never targeted by this kind of attack. If you do not have a specific job or threat that justifies it, turning this mode on instead of using a strong passcode and updates is not a proportionate choice. If you do have a real reason:
- First update all of your Apple devices. For complete coverage, turn the mode on separately on iPhone, iPad and Mac. Turning it on for iPhone usually brings a paired Apple Watch along with it.
- Go to Settings > Privacy & Security > Lockdown Mode.
- Tap to turn it on, confirm once more, then tap Turn On & Restart and enter the device passcode.
- After the restart, if a site you need for essential work breaks, you can exclude that site: in Safari open the page menu, go to website settings and turn Lockdown Mode off for that address. An exclusion reduces protection; do this only for a site you trust and only if you must.
- On newer versions you can also exclude a contact or an app from some limits. Treat every exclusion as a hole you chose on purpose.
Read the fuller list of limits on the official Apple page linked above. This mode does not replace reviewing the account and installing updates, and it is turned on separately on Mac and iPad.
How iPad differs
Most of the paths in this page exist on iPad as well: updates, a passcode, Find My, permissions, AirDrop, wired accessories and Lockdown Mode. Stolen Device Protection is currently an iPhone feature; on iPad lean more on a strong passcode, Find My and the Apple Account. An iPad handed around among several people without separate accounts effectively shares every open mailbox and file. For a child or a colleague, use a separate user or family restrictions, not one shared passcode on your own account.
Before selling, giving away or leaving a device for repair
- Take a fresh backup and check that it restores, following the backup guide.
- Turn off Stolen Device Protection if needed so it does not stand in the way of erasing.
- Use Settings > General > Transfer or Reset iPhone (or iPad) and erase all content and settings. That signs out of the Apple Account and lifts Activation Lock for the next owner.
- Before you hand it over, turn the device on and check that the initial setup screen appears, not a lock screen still tied to the previous owner.
- If you leave the device for repair and do not want to erase it, at least keep the screen lock, do not turn off Find My unless an official repair process says otherwise, and remove especially sensitive data from it. Newer software may offer a Repair or Trade-In path that keeps the device findable during service; if that path is there, read the official steps instead of turning Find My off completely.
Common mistakes
- A simple four-digit passcode and every lock-screen access left on.
- Find My left off until the day the device goes missing.
- Sharing one Apple Account among several family members.
- Storing the account recovery key inside iCloud itself.
- Turning on Lockdown Mode instead of doing the basics — or, at the other extreme, ignoring it when there is a real targeted threat.
- Removing a stolen device from the Find My list because “it is no longer my problem”.
Limit Siri and assistants on the lock screen
If Siri answers while the device is locked, someone who has picked up the phone may be able to send a message, place a call or ask about calendar and reminders without unlocking it. Treat this separately from Siri itself; you can keep the assistant and only close its lock-screen access.
- Go to Settings > Face ID & Passcode and enter the passcode.
- In the allow-access-when-locked list, turn off Siri if you do not want to give it commands without unlocking the device.
- Apply the same logic to Wallet and Home if they do not need to open from the lock screen.
- In Siri’s own settings, review what it is allowed to do when locked and limit replies that include personal content.
Attention for Face ID, and unknown senders
If Face ID works without attention, in some situations bringing the device up to your face may unlock it. If that matters to you, leave the require-attention option on in the same Face ID screen. For messages, filtering unknown senders helps keep links and images from a number that is not in your address book separate:
- Go to Settings > Messages.
- Turn on Filter Unknown Senders.
- Review link previews if they do not need to be open for everyone.
- Review saved passwords and passkeys in the Passwords app or from Settings, and move reused ones into your own manager; how to choose that tool is in the password-manager guide.
What to do from today
- Install system and app updates and turn on automatic updates.
- Change the device passcode to a longer or alphanumeric code and reduce lock-screen access.
- Check Find My and, on iPhone, Stolen Device Protection.
- Review Apple Account sign-in and security, connected devices and the recovery method.
- Go through app access to location, microphone, photos and tracking once and cut it down.
Related guides

Phones and computers
Mac security: patches, FileVault and access boundaries
Keep a Mac safer by installing patches, turning on FileVault and reviewing app permissions. Store the recovery key away from the Mac itself, and protect the Apple Account like any…

Files and information
Backups and recovery: copies you can actually restore
A backup counts only if you can restore it without the lost device or account. Syncing is not enough; keep extra copies of what matters, store at least one copy somewhere else,…

Assess and plan
Private communication: choose channels, verify contacts and limit disclosure
Private communication depends on more than the messenger’s name. Weigh the encryption of that specific chat, who the recipient really is, who else is in the group, and where…
Communication
Suspected account compromise: contain, recover and revoke persistent access
If an account may have been taken over, change the password from a device you trust, sign out other sessions, and review recovery methods and forwarding rules. Changing the…

Passwords
Two-factor authentication: which method, how, and a recovery plan
Two-factor authentication protects an account even if the password leaks, but methods are not equal. Prefer an authenticator app or a passkey over SMS for important accounts, and…